It has been a while since I’ve deployed a VDP appliance and since I had the opportunity to do so this week, I took the time to screenshot the process so I can write what would likely be the last post for this application since VMware will no longer be releasing new versions in the future. For those interested, here is the latest compatibility matrix for vCenter Server and VDP:
https://www.vmware.com/resources/compatibility/sim/interop_matrix.php#interop&2=&68=

The deployment hasn’t changed much throughout the versions so this post serves more to demonstrate what the deployment looks like rather than how.
Deploying the OVA
One of the features I’ve enjoyed using since vSphere 6.0 is Content Libraries but I’d like to note that you can only deploy OVF packages and not OVA files from Content Libraries as outlined in this VMware Docs:
Templates in Content Libraries
https://docs.vmware.com/en/VMware-vSphere/6.7/com.vmware.vsphere.vm_admin.doc/GUID-F7BF0E6B-7C4F-4E46-8BBF-76229AEA7220.html
Templates are master copies of virtual machines that you can use to deploy virtual machines that are customized and ready for use. Templates promote consistency throughout your vSphere environment. Content libraries support only OVF templates. As a result, VM and Vapp templates are converted to OVF files when you upload the to a content library. You can use the templates to deploy virtual machines and vApps in the vSphere inventory.

With the above in mind, the best way to start the appliance deployment is simply use the Deploy OVF Template… option from within the vSphere Client or vSphere Web Client to select the download OVA file:

Select the Local file radio button and click on Choose Files to select the downloaded OVA VDP appliance:

vSphereDataProtection-6.1.9.ova

Proceed by selecting the folder location and configuring a meaningful name for the appliance:

Select the appropriate cluster for the appliance:

Review the details:

Accept the EULA as we always do:

Select the datastore that will store the appliance:

Configure the port group (VLAN) for the appliance:

Configure the network properties for the appliance:

Review the configuration and commence the deployment:


Configuring the appliance
Power on the VDP appliance once the OVA deployment has completed and wait until the operating system has completed resulting with the following screen displayed:
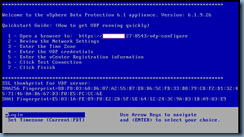
Navigate to the appliance via https://<IP Address>/vdp-configure and login with:
root / changeme

The following configuration will be presented:

Configure the IP settings as well as create an A (forward) and PTR (reverse) record for the appliance in your DNS:
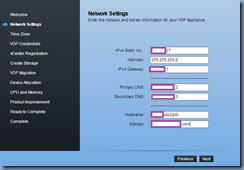
Forgetting to create the DNS records will throw the following error:
IP/DNS could not be resolved. Check the IP, DNS values for forward and reverse lookup validation.

Configure the appropriate time zone:

Configure a password for the appliance that will change the default changeme password:

Configure the connect to the vCenter that this VDP appliance will connect to:

Click on the Test Connection button before attempting to hit the Next button as it is a requirement:

This part of the wizard is where you define the type of storage the VDP appliance will use. The first option is to create new storage by adding VMDK disks to the VDP appliance to store backups, the second option is to attached existing disks from another VDP appliance and the third option is to migrate VDP storage data from another VDP release. For the purpose of this example, we’ll be creating new storage that is 0.5TB in size because the intention is to attached this VDP deployment to a Data Domain.

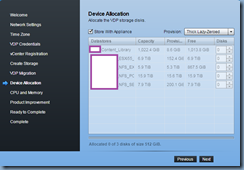
Leave the Device Allocation settings as the default unless you want to separate the disks from the actual appliance:
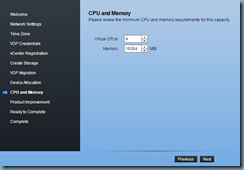
Configure the CPU and Memory according to the recommended settings for the size of your backups as noted here:
https://docs.vmware.com/en/VMware-vSphere/6.5/vmware-data-protection-administration-guide-61.pdf


Decide whether you want to join the feedback program (not sure whether this is relevant since this would be the last release:

Complete the deployment and decide whether to run the performance analysis on the storage configuration. I will not be selecting this because we’ll be attaching this to a data domain:


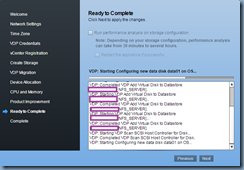
The deployment will display the login screen during the configuration but don’t bother trying to log in as you won’t be able to:

Instead, proceed to the console of the appliance and wait until it restarts and boots back into the OS:

Log back into the appliance and you should see the appliance successfully deployed:


Note the size of the disks that are configured for a 0.5TB deployment:
boot – 200GB
data01 – 256GB
data02 – 256GB
data03 – 256GB

For comparison purposes, these are the size of the disks for a 1TB deployment:
boot – 200GB
data01 – 512GB
data02 – 512GB
data03 – 512GB

One of the things I eventually realized at the end of this deployment was that the Data Domain in this environment had a DDOS (Data Domain Operating System) that was at a version that no longer supported the VDP appliance since VMware was no longer going to release this product so when I attempted to connect to the DD, I will receive the following error:

Failed to add the Data Domain.
Reasons: Failed to connect to Data Domain system. The hostname, user name and/or password may be invalid.

Here is a are two snippets from the EMC site:
On April 5th, 2017, VMware announced the End of Availability (EOA) of the VMware vSphere Data Protection (VDP) product. At this time the latest release of VDP uses DDboost library 3.1.0.1 which is compatible up to DDOS 5.7.X. Due to the End of Availability announcement there are no plans to introduce additional DDboost libraries to allow support of later DDOS releases.
For additional information on VDP/Data Domain compatibility please see the DDBoost for VMware compatibility Matrix found here:
DDBoost Compatibility Matrix
For additional information on the end of service life for VMware Data Protection please see the following documentation from VMware:
End of Availability (EOA) of VMware vSphere Data Protection (2149614)
----------------------------------------------------------------------------------------------------------------------------------------------------
Cause: | The latest version of the vDP contains the gsan 7.2.80.133 release. This version contains the 3.1.0.1-481386 ddboost libraries. This is not supported with the DDOS 6.1.x or greater releases. |
Resolution: | 1. Deploy an AVE and consider migrating the data from the vDP to AVE |