I recently had to use OpenSSL to generate a CSR and complete the certificate request for a Cisco Wireless Controller and noticed that the Cisco provided guide did not include some steps that caused errors to be thrown so I thought it would be good to document the process here in this blog post in case I ever had to do it again.
Cisco recommends OpenSSL 0.9.8 but I was unable to find it because it is most likely very old so I downloaded version 1.0.0q here:
https://slproweb.com/products/Win32OpenSSL.html
The first error you will run into is the following when you try to execute openssl.exe:
C:\OpenSSL-Win32\bin>openssl.exe
WARNING: can't open config file: C:\OpenSSL-Win32\bin\openssl.cfg
OpenSSL>

The reason why this error is thrown is because a path needs to get set up for the openssl.cfg configuration file. Where it is set up does not matter as it just needs to be a valid and accessible path so the following will place it in the C:\OpenSSL-Win32\bin folder:
C:\OpenSSL-Win32\bin>set openssl_conf=c:\OpenSSL-Win32\bin\openssl.cfg
Openssl.exe will execute without errors once the path is set:
C:\OpenSSL-Win32\bin>openssl
OpenSSL> req -new -newkey rsa:2048 -nodes -keyout mykey.pem -out myreq.pem
Loading 'screen' into random state - done
Generating a 2048 bit RSA private key
.................+++
........................................................................+++
writing new private key to 'mykey.pem'
-----
You are about to be asked to enter information that will be incorporated
into your certificate request.
What you are about to enter is what is called a Distinguished Name or a DN.
There are quite a few fields but you can leave some blank
For some fields there will be a default value,
If you enter '.', the field will be left blank.
-----
Country Name (2 letter code) [AU]:
State or Province Name (full name) [Some-State]:
Locality Name (eg, city) []:
Organization Name (eg, company) [Internet Widgits Pty Ltd]:
Organizational Unit Name (eg, section) []:
Common Name (e.g. server FQDN or YOUR name) []:
Email Address []:
Please enter the following 'extra' attributes
to be sent with your certificate request
A challenge password []:
An optional company name []:
OpenSSL>
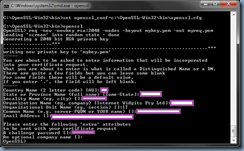
Once the process shown above is complete, a myreq.pem file will be generated with content similar to the following:
-----BEGIN CERTIFICATE REQUEST-----
MIIC+TCCAeECAQAwgZoxCzAJBgNVBAYTAkJNMREwDwYDVQQIDAhIYW1pbHRvbjER
MA8GA1UEBwwIS5hklohjggf5TAPBgNVBAoMCEFyaWVsIFJlMQswCQYDVQQLDAJJ
VDEYMBYGA1UEAwwPd2xjLmFyaWVscmUuY29tMSswKQYJKoZIhvcNAQkBFhxhbmRy
ZXcud29vZHdvcnRoQGFyaWVscmUuY29tMIIBIjANBgkqhkiG9w0BAQEFAAOCAQ8A
MIIBCgKCAQEA1R43325hjkuiukjl;o9oiiH2x3xoAyZidlW1r3TrdTzcCEqetyYO+e34C
TFAIKx6wWocvIX9GBuNQ7RJmLlM40DaHJXhPbPQvBtyvzJunR+ABvtcnZtfQ63tV
279+rHTrHaspVJU4zEHg9vV6cq6Hhx4mVQfwn+9hjI/a+J4mnTs75giRlgLQna10
XG2XMvmLEvqV5FKQIFuJlYAz5N/A/Qnh3+3lRPBuR5kYSinMeT5WVKORYySdSk4r
SAoGb1gwp1zDirskfhwMzSDNCJAq7gSsc9BA3oITuCoiyB7zonsfEI6XCZ4DZsL5
JJa1a7M1FhcJiU3ULZ8HDLs7Wx+bi7oJwQIDAQABoBkwFwYJKoZIhvcNAQkHMQoM
CFBAc3N3MHJkMA0GCSqGSIb3DQEBBQUAA4IBAQBEjhRQtyMp3qLXkL/h46RVgHOH
P5rPoNXuKhgnTuFrIttyG6ON9hs/w/Ax2tc1rkhCJ3920O9FA9cI5L/GwQzmJXl1
WutujW3t/ysUX3th5ewkiIeYaKeP8lZuAfkhfrmik1SrBz2O8WGwPSOauSH1UgcXo
ubqDWt8MMOnq/GCZ6l/qDYumw47uV9ZeRBBPeMEc7VqN/LJUUdyzJ95thzX9mFwg
Xe47BewbmjKWgwRPotZu702oqU3MNIc0t+IbWdRRhfhLz+PvOBqRxvocdyZE2Szy
8eZfR/0wFr33tzXnqD4DMv2smWGyLpgcymUlz1GXrjF75xuO+Nm7ehqTMFL8
-----END CERTIFICATE REQUEST-----
Copy the content above and submit it to your preferred Certificate Authority to obtain an Apache compatible response CRT file a long with the certificate chain. With the files obtained from the CA, proceed and open up the files in a text editor and paste them in the following order:
-----BEGIN CERTIFICATE-----
*Device cert*
-----END CERTIFICATE-----
-----BEGIN CERTIFICATE-----
*Intermediate CA cert*
-----END CERTIFICATE-----
-----BEGIN CERTIFICATE-----
*Root CA cert*
-----END CERTIFICATE-----
Below is an example of what it should look like:
Below is the file in its proper format:
-----BEGIN CERTIFICATE-----
MIIFTTCCBDWgAwIBAgIJAKABGuxLwr3OMA0GCSqGSIb3DQEBBQUAMIHKMQswCQYD
VQQGEwJVUzEQMA4GA1UECBMHQXJpem9uYTETMBEGA1UEBxMKU2NvdHRzZGFsZTEa
MBgGA1UEChMRR29EYWRkeS5jb20sIEluYy4xMzAxBgNVBAsTKmh0dHA6Ly9jZXJ0
aWZpY2F0ZXMuZ29kYWRkeS5jb20vcmVwb3NpdG9yeTEwMC4GA1UEAxMnR28gRGFk
ZHkgU2VjdXJlIENlcnRpZmljYXRpb24gQXV0aG9yaXR5MREwDwYDVQQFEwgwNzk2
OTI4NzAeFw0xNTAzMTUwMjI5MzhaFw0xNjAzMTEyMDE0MzhaMD0xITAfBgNVBAsT
GERvbWFpbiBDb250cm9sIFZhbGlkYXRlZDEYMBYGA1UEAxMPd2xjLmFyaWVscmUu
Y29tMIIBIjANBgkqhkiG9w0BAQEFAAOCAQ8AMIIBCgKCAQEA1R38Ur3NWr3WhhHG
PH2x3xoAyZidlW1r3TrdTzcCEqetyYO+e34CTFAIKx6wWocvIX9GBuNQ7RJmLlM4
0DaHJXhPbPQvBtyvzJunR+ABvtcnZtfQ63tV279+rHTrHaspVJU4zEHg9vV6cq6H
hx4mVQfwn+9hjI/a+J4mnTs75giRlgLQna10XG2XMvmLEvqV5FKQIFuJlYAz5N/A
/Qnh3+3lRPBuR5kYSinMeT5WVKORYySdSk4rSAoGb1gwp1zDirskfhwMzSDNCJAq
7gSsc9BA3oITuCoiyB7zonsfEI6XCZ4DZsL5JJa1a7M1FhcJiU3ULZ8HDLs7Wx+b
i7oJwQIDAQABo4IBwDCCAbwwDAYDVR0TAQH/BAIwADAdBgNVHSUEFjAUBggrBgEF
BQcDAQYIKwYBBQUHAwIwDgYDVR0PAQH/BAQDAgWgMDQGA1UdHwQtMCswKaAnoCWG
I2h0dHA6Ly9jcmwuZ29kYWRkeS5jb20vZ2RzMS0xMTIuY3JsMFMGA1UdIARMMEow
SAYLYIZIAYb9bQEHFwEwOTA3BggrBgEFBQcCARYraHR0cDovL2NlcnRpZmljYXRl
cy5nb2RhZGR5LmNvbS9yZXBvc2l0b3J5LzCBgAYIKwYBBQUHAQEEdDByMCQGCCsG
AQUFBzABhhhodHRwOi8vb2NzcC5nb2RhZGR5LmNvbS8wSgYIKwYBBQUHMAKGPmh0
dHA6Ly9jZXJ0aWZpY2F0ZXMuZ29kYWRkeS5jb20vcmVwb3NpdG9yeS9nZF9pbnRl
cm1lZGlhdGUuY3J0MB8GA1UdIwQYMBaAFP2sYTKTbEXW4u6FX5q653aZaMznMC8G
A1UdEQQoMCaCD3dsYy5hcmllbHJlLmNvbYITd3d3LndsYy5hcmllbHJlLmNvbTAd
BgNVHQ4EFgQUmhLDlWChQjzT5mbB7PoGmPdiW+owDQYJKoZIhvcNAQEFBQADggEB
AEtuQGHJBZv8YAFtdIX3YRh+4+pVjpvfZ6TDyRqNYjzrlyUlnJ7+UnG6Ax1G7w9H
6tSsH9HqD31gWj/ka9QpLYxu0lDLTkp1igI6PftMhCCVLhUCGgYaXTR8dKh7RE9f
Wbe9XoAgHJBO1asgPKkaStK50qodocF0mUZA3iB9754kbk0AJY9C1E0CNSKsS3X3
eSZg1cSF2hd9hndCSsj8FFTd/P/i799drXQXWx3BBCaVqgEtLGgU0KvgHpirNUPS
A8aYDY/t3x4vnTVv/1iBR0YdM5IwrgPIfrTTzWZ/SBbgpQ4efm9U89t3VGYeFZeP
iB2b0VLAcjKYBjHIGRQj858=
-----END CERTIFICATE-----
-----BEGIN CERTIFICATE-----
MIIE3jCCA8agAwIBAgICAwEwDQYJKoZIhvcNAQEFBQAwYzELMAkGA1UEBhMCVVMx
ITAfBgNVBAoTGFRoZSBHbyBEYWRkeSBHcm91cCwgSW5jLjExMC8GA1UECxMoR28g
RGFkZHkgQ2xhc3MgMiBDZXJ0aWZpY2F0aW9uIEF1dGhvcml0eTAeFw0wNjExMTYw
MTU0MzdaFw0yNjExMTYwMTU0MzdaMIHKMQswCQYDVQQGEwJVUzEQMA4GA1UECBMH
QXJpem9uYTETMBEGA1UEBxMKU2NvdHRzZGFsZTEaMBgGA1UEChMRR29EYWRkeS5j
b20sIEluYy4xMzAxBgNVBAsTKmh0dHA6Ly9jZXJ0aWZpY2F0ZXMuZ29kYWRkeS5j
b20vcmVwb3NpdG9yeTEwMC4GA1UEAxMnR28gRGFkZHkgU2VjdXJlIENlcnRpZmlj
YXRpb24gQXV0aG9yaXR5MREwDwYDVQQFEwgwNzk2OTI4NzCCASIwDQYJKoZIhvcN
AQEBBQADggEPADCCAQoCggEBAMQt1RWMnCZM7DI161+4WQFapmGBWTtwY6vj3D3H
KrjJM9N55DrtPDAjhI6zMBS2sofDPZVUBJ7fmd0LJR4h3mUpfjWoqVTr9vcyOdQm
VZWt7/v+WIbXnvQAjYwqDL1CBM6nPwT27oDyqu9SoWlm2r4arV3aLGbqGmu75RpR
SgAvSMeYddi5Kcju+GZtCpyz8/x4fKL4o/K1w/O5epHBp+YlLpyo7RJlbmr2EkRT
cDCVw5wrWCs9CHRK8r5RsL+H0EwnWGu1NcWdrxcx+AuP7q2BNgWJCJjPOq8lh8BJ
6qf9Z/dFjpfMFDniNoW1fho3/Rb2cRGadDAW/hOUoz+EDU8CAwEAAaOCATIwggEu
MB0GA1UdDgQWBBT9rGEyk2xF1uLuhV+auud2mWjM5zAfBgNVHSMEGDAWgBTSxLDS
kdRMEXGzYcs9of7dqGrU4zASBgNVHRMBAf8ECDAGAQH/AgEAMDMGCCsGAQUFBwEB
BCcwJTAjBggrBgEFBQcwAYYXaHR0cDovL29jc3AuZ29kYWRkeS5jb20wRgYDVR0f
BD8wPTA7oDmgN4Y1aHR0cDovL2NlcnRpZmljYXRlcy5nb2RhZGR5LmNvbS9yZXBv
c2l0b3J5L2dkcm9vdC5jcmwwSwYDVR0gBEQwQjBABgRVHSAAMDgwNgYIKwYBBQUH
AgEWKmh0dHA6Ly9jZXJ0aWZpY2F0ZXMuZ29kYWRkeS5jb20vcmVwb3NpdG9yeTAO
BgNVHQ8BAf8EBAMCAQYwDQYJKoZIhvcNAQEFBQADggEBANKGwOy9+aG2Z+5mC6IG
OgRQjhVyrEp0lVPLN8tESe8HkGsz2ZbwlFalEzAFPIUyIXvJxwqoJKSQ3kbTJSMU
A2fCENZvD117esyfxVgqwcSeIaha86ykRvOe5GPLL5CkKSkB2XIsKd83ASe8T+5o
0yGPwLPk9Qnt0hCqU7S+8MxZC9Y7lhyVJEnfzuz9p0iRFEUOOjZv2kWzRaJBydTX
RE4+uXR21aITVSzGh6O1mawGhId/dQb8vxRMDsxuxN89txJx9OjxUUAiKEngHUuH
qDTMBqLdElrRhjZkAzVvb3du6/KFUJheqwNTrZEjYx8WnM25sgVjOuH0aBsXBTWV
U+4=
-----END CERTIFICATE-----
-----BEGIN CERTIFICATE-----
MIIEADCCAuigAwIBAgIBADANBgkqhkiG9w0BAQUFADBjMQswCQYDVQQGEwJVUzEh
MB8GA1UEChMYVGhlIEdvIERhZGR5IEdyb3VwLCBJbmMuMTEwLwYDVQQLEyhHbyBE
YWRkeSBDbGFzcyAyIENlcnRpZmljYXRpb24gQXV0aG9yaXR5MB4XDTA0MDYyOTE3
MDYyMFoXDTM0MDYyOTE3MDYyMFowYzELMAkGA1UEBhMCVVMxITAfBgNVBAoTGFRo
ZSBHbyBEYWRkeSBHcm91cCwgSW5jLjExMC8GA1UECxMoR28gRGFkZHkgQ2xhc3Mg
MiBDZXJ0aWZpY2F0aW9uIEF1dGhvcml0eTCCASAwDQYJKoZIhvcNAQEBBQADggEN
ADCCAQgCggEBAN6d1+pXGEmhW+vXX0iG6r7d/+TvZxz0ZWizV3GgXne77ZtJ6XCA
PVYYYwhv2vLM0D9/AlQiVdw4ytoHUwHU9S3/Hd8M+eKsaA7Ugay9qK7HFiH7Eux6w
wdhFJ2+qN1j3hybX2C32qRe3H3I2TqYf34ggfsqbl2i/ojgC95/5Y0V4evLOtXi
EqITLdiOr18SPaadsfew324ARFmR6jYGB0xUGlcmIbYsUfb18aQr4CUWWoriMY
avx4A6lNf4DD+qta/KFApMoZFv6yyO9ecw3ud72a9nmYvLEHZ6IVDd2gWMZEewo+
YihfukEHU1jPEX44dMX4/7VpkI+EdOqXG68CAQOjgcAwgb0wHQYDVR0OBBYEFNLE
sNKR1EwRcbNhyz2h/t2oatTjMIGNBgNVHSMEgYUwgYKAFNLEsNKR1EwRcbNhyz2h
/t2oatTjoWekZTBjMQswCQYDVQQGEwJVUzEhMB8GA1UEChMYVGhlIEdvIERhZGR5
IEdyb3VwLCBJbmMuMTEwLwLKoiuwelkyhHbyBEYWRkeSBDbGFzcyAyIENlcnRpZmlj
YXRpb24gQXV0aG9yaXR5ggEAMAwGA1UdEwQFMAMBAf8wDQYJKoZIhvcNAQEFBQAD
ggEBADJL87LKPpH8EsahB4yOd6AzBhRckB4Y9wimPQoZ+YeAEW5p5JYXMP80kWNy
OO7MHAGjHZQopDH2esRU1/blMVgDoszOYtuURXO1v0XJJLXVggKtI3lpjbi2Tc7P
TMozI+gciKqdi0FuFskg5YmezTvacPd+mSYgFFQlq25zheabIZ0KbIIOqPjCDPoQ
HmyW74cNxA9hi63ugyuV+Idr4y54hj+2DzZduCLzrTia2cyvk0/ZM/iZx4mER
dEr/VxqHD3VILs9RaRegAhJd33552TO7ErBBDpqWeCtWVYpoNz4iCxTIM5Cuf
ReYNnyicsbkqWletNw+vHX/bvZ8=
-----END CERTIFICATE-----
Save the file as All-certs.pem.
Launch openssl.exe again and you’ll notice that if you attempt to execute the Cisco instructed command:
pkcs12 -export -in C:\OpenSSL-Win32\bin\All-certs.pem -inkey C:\OpenSSL
-Win32\bin\mykey.pem -out C:\OpenSSL-Win32\bin\All-certs.p12 -clcerts -passin pa
ss:P@ssw0rd -passout pass:P@ssw0rd
… then you will quickly receive the following error:
unable to write ‘random state’ error
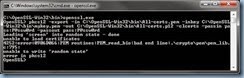
To remove this error, simply set the variable as such:
set RANDFILE=C:\OpenSSL-Win32\bin\.rnd
The error should no longer be thrown once the variable is set:
C:\OpenSSL-Win32\bin>set RANDFILE=C:\OpenSSL-Win32\bin\.rnd
C:\OpenSSL-Win32\bin>openssl.exe
OpenSSL> pkcs12 -export -in C:\OpenSSL-Win32\bin\All-certs.pem -inkey C:\OpenSSL
-Win32\bin\mykey.pem -out C:\OpenSSL-Win32\bin\All-certs.p12 -clcerts -passin pa
ss:P@ssw0rd -passout pass:P@ssw0rd
Loading 'screen' into random state - done
unable to load certificates
4216:error:0906D066:PEM routines:PEM_read_bio:bad end line:.\crypto\pem\pem_lib.
c:795:
error in pkcs12
OpenSSL>
![clip_image002[4]](https://blogger.googleusercontent.com/img/b/R29vZ2xl/AVvXsEhh3vVrLsO1B_L4fnfBAeOBWzPcz9PygNQknqoxfqGLu43P_F2OZ8wM9NDCfh7sFdZ5AWYQKV0t17zAK0yQUjOqG6fFwoW3inZQA3h9xM1MrJn5x1vXKD2YdyNq4II1QtG3_4DdNgHvIK5V/?imgmax=800 "clip_image002[4]")
The format of the All-certs.pem file has to be in an exact format as shown above or it won’t work. Failure to format the All-certs.pem file correctly such as not having the right line breaks will throw the error message:
unable to load certificates
4252:error:0906D066:PEM routines:PEM_read_bio:bad end line:.\crypto\pem\pem_lib.
c:795:
The output would look something like the following:
C:\OpenSSL-Win32\bin>openssl.exe
OpenSSL> pkcs12 -export -in C:\OpenSSL-Win32\bin\All-certs.pem -inkey C:\OpenSSL
-Win32\bin\mykey.pem -out C:\OpenSSL-Win32\bin\All-certs.p12 -clcerts -passin pa
ss:P@ssw0rd -passout pass:P@ssw0rd
Loading 'screen' into random state - done
unable to load certificates
4252:error:0906D066:PEM routines:PEM_read_bio:bad end line:.\crypto\pem\pem_lib.
c:795:
error in pkcs12
OpenSSL>
![clip_image002[6]](https://blogger.googleusercontent.com/img/b/R29vZ2xl/AVvXsEho0czQI9T6JKo_kIlEAT309TuN0aT6qoMgPjx4u4CEFgmiFaKjvONcvGL_z8hH12D4wpyZJAzaQ0IqC-TSp276vXukv8J58JapVlG12l7w_fe4Qy7MohcLTtHLP8JSK4h3Bs5pWAXOsj8g/?imgmax=800 "clip_image002[6]")
Fixing the All-certs.pem file with errors such line breaks will remove the error and complete the process of generating the All-certs.p12 file:
C:\OpenSSL-Win32\bin>openssl.exe
OpenSSL> pkcs12 -export -in C:\OpenSSL-Win32\bin\All-certs.pem -inkey C:\OpenSSL-Win32\bin\mykey.pem -out C:\OpenSSL-Win32\bin\All-certs.p12 -clcerts -passin pass:P@ssw0rd -passout pass:P@ssw0rd
Loading 'screen' into random state - done
OpenSSL>
![clip_image002[8]](https://blogger.googleusercontent.com/img/b/R29vZ2xl/AVvXsEgV4pIxuHD2m8s03DuAD4ZoKzb3sDdgGkboN3q040_4fFX4D9hZFSBE1HO_-0inXIVbAByZDtgHA423vPAdGod3PlDxE6WyDPQm12CaOcKKMQ2Rnyew5B6KEUOzgsHdRGziDiU5lEadiOyA/?imgmax=800 "clip_image002[8]")
The final step for creating the final-cert.pem file does not require any special steps:
OpenSSL> pkcs12 -in All-certs.p12 -out final-cert.pem -passin pass:P@ssw0rd -pas
sout pass:P@ssw0rd
MAC verified OK
OpenSSL>
![clip_image002[10]](https://blogger.googleusercontent.com/img/b/R29vZ2xl/AVvXsEjFzkfv-NaG7J0THhvQkqJq71jSjjYQjm4Fim3jRyf7fGE451S8gtQImqDC6vddDFLitQNylvC5rDTAgHf17rHsm6kzCBp1VTsxTBAt0wY7TBSEEry2wcON6vhpw8W1fI3XZPsCBMH4SwIe/?imgmax=800 "clip_image002[10]")
The final-cert.pem file is what you will use to upload onto the Cisco Wireless Controller to secure the login web page.

![clip_image002[4]](https://blogger.googleusercontent.com/img/b/R29vZ2xl/AVvXsEgWQsX4X0vP2QEMEncWRLNbUkKd0nrAAebf-LgsCST8y7EjOyJyMNAxIfRgXTpVaNwk0BDOlwCvOpEoaaFUNpS_J6-5VxCoDBkLSaZgpmb5XFVWpMG8BXO8pbvioIzirmAaK9iyG8sQGhZm/s1600-h/clip_image002%25255B4%25255D%25255B3%25255D.jpg "clip_image002[4]")
![clip_image002[6]](https://blogger.googleusercontent.com/img/b/R29vZ2xl/AVvXsEjFKSGCyQUXD5FhMs3fSJbWVhTm_V6o9XqIGRaN9PpGnK22TyT0YmEVBK9OFZ0fiQefjwnwHQgz4sLqpaHAUOCexZ5rikF_87s0jtQRjYfLVjNzU1wlBS5ecAzmJiSmc5rjKHbm58xJqtjV/s1600-h/clip_image002%25255B6%25255D%25255B4%25255D.jpg "clip_image002[6]")


![clip_image002[4]](https://blogger.googleusercontent.com/img/b/R29vZ2xl/AVvXsEh-HyjnPNB3Qg3hsEtdMNkIHRYz262pkBUIeUlZoBEg2yzvVBN3-9IIInLyljNImsnB_blc3jHeK0WtPPifuj3z_6DP7zjfvPj0nxBl24qVijRwyATUerubVkQJjbjLXvkbdlFnTkEpGdhC/s1600-h/clip_image002%25255B4%25255D%25255B2%25255D.jpg "clip_image002[4]")
![clip_image002[6]](https://blogger.googleusercontent.com/img/b/R29vZ2xl/AVvXsEgjkUDizNQQALtzd8h_3Ztvoq02R-CESX4B8BK3nOhHrTjP70sJx8ywapL900aerd66z8ZpKmZWO_d6Ih9SeUKTAPriKwqFJZd8SlBKPpzceoCeUkJg_OtdpXwRNwrevxK-pjINoZ7eb0yJ/s1600-h/clip_image002%25255B6%25255D%25255B2%25255D.jpg "clip_image002[6]")
![clip_image002[8]](https://blogger.googleusercontent.com/img/b/R29vZ2xl/AVvXsEjwqZvIh6CnqgSheSeZhVI80NGn36M88k_rRSjk_p5Jb8Zh0kNd3sWh0dbe81vEAhVkDqYf8qoJ8YHzoSPkErcRluYzL9BZAR-OJ8RT6WPRzGjD0jCNb7Y9W-kax_UfwGjndCrbwgu14o-m/s1600-h/clip_image002%25255B8%25255D%25255B2%25255D.jpg "clip_image002[8]")
![clip_image002[10]](https://blogger.googleusercontent.com/img/b/R29vZ2xl/AVvXsEg3RV8eEzRfelhmCVaQ0aYqAIHIODxgkXzVxl0dBnLnU1wRtZ1ZKORbL_VO_-GWQI3nbnWyEDNhwcgRvT5ShBHjnYENNzfsuEY1QeKDGa8BzoJNqSm0J5UagyAieD2Pl-zOes0lIJslWxbS/s1600-h/clip_image002%25255B10%25255D%25255B2%25255D.jpg "clip_image002[10]")


