Pages

Showing posts with label Certificate Authority. Show all posts

Monday, March 26, 2018

Attempting to generate a new CSR with OpenSSL fails with: “13536:error:0E06D06A:configuration file routines:NCONF_get_string:no conf or environment variable:crypto\conf\conf_lib.c:272:”

Problem

You’ve downloaded OpenSSL and have began the process of generating a new CSR to submit to a Certificate authority but notice that executing the following command:

req -new -newkey rsa:2048 -nodes -keyout mykey.pem -out myreq.pem

… generates the following error:

C:\OpenSSL-Win64\bin>openssl.exe

OpenSSL> req -new -newkey rsa:2048 -nodes -keyout mykey.pem -out myreq.pem

Can't open C:\Program Files\Common Files\SSL/openssl.cnf for reading, No such file or directory

13536:error:02001003:system library:fopen:No such process:crypto\bio\bss_file.c:74:fopen('C:\Program Files\Common Files\SSL/openssl.cnf','r')

13536:error:2006D080:BIO routines:BIO_new_file:no such file:crypto\bio\bss_file.c:81:

Generating a 2048 bit RSA private key

........+++

............................................+++

writing new private key to 'mykey.pem'

-----

unable to find 'distinguished_name' in config

problems making Certificate Request

13536:error:0E06D06A:configuration file routines:NCONF_get_string:no conf or environment variable:crypto\conf\conf_lib.c:272:

error in req

OpenSSL>

image

Solution

One of the reasons why the error above would be thrown is if the openssl_confg is not configured properly to the openssl.cfg file.  To do so, execute the following command (change the path as required):

set openssl_conf=c:\OpenSSL-Win64\bin\openssl.cfg

The CSR generation will proceed as expected once the configuration file is specified:

C:\OpenSSL-Win64\bin>openssl.exe

OpenSSL> req -new -newkey rsa:2048 -nodes -keyout mykey.pem -out myreq.pem

Generating a 2048 bit RSA private key

...................................................+++

.....................+++

writing new private key to 'mykey.pem'

-----

You are about to be asked to enter information that will be incorporated

into your certificate request.

What you are about to enter is what is called a Distinguished Name or a DN.

There are quite a few fields but you can leave some blank

For some fields there will be a default value,

If you enter '.', the field will be left blank.

-----

Country Name (2 letter code) [AU]:

image

Please refer to one of my older posts if you’re using OpenSSL to generate a certificate for a Cisco Wireless Controller:

Generating SSL certificate with OpenSSL for Cisco Wireless Controller
http://terenceluk.blogspot.com/2015/03/generating-ssl-certificate-with-openssl.html

Thursday, March 8, 2018

Skype for Business Server 2015 logs the error: “GetAndPublish web service failed due to an internal error. This may impact user sign-in.”

Problem

You’ve received reports that users have experienced issues with logging into an audio conference as the leader with their PIN and noticed that your Skype for Business Server 2015 front-end server has the following error written in the Lync Server logs:

Log Name: Lync Server

Source: LS UserPin Service

47055

Level: Error

GetAndPublish web service failed due to an internal error. This may impact user sign-in.

Request Details - Entity: [agrant@contoso.com], Device Id: [6EFEFC0B-234D-55CA-A44F-061007CDAC2F], Authenticated User: [sip:agrant@contoso.com].

Additional Context: [CA_Failure: InternalError]

Cause: This is an unexpected failure

Resolution:

Re-start the web server. If you see this error continuously, examine the server traces and contact product support.

image

Solution

One of the reasons why this error would be thrown causing audio conferencing PIN login issues is if the front-end server is assigned a certificate that is configured with an unsupported Signature Algorithm such as the following example:

Signature algorithm: RSASSA-PSS

image

To correct the issue, either change the issuing certificate authority’s signature algorithm to a supported algorithm such as sha256RSA or obtain a certificate from an authority with a supported signature algorithm such as the following:

image

The above event log error will no longer be written and PIN sign in services will operate as expected once a certificate issued by a certificate authority with a supported signature algorithm is assigned

Friday, September 29, 2017

Adding SAN (Subject Alternative Name” into “Additional Attributes” field on a Microsoft Certificate Authority certificate request form does not generate a certificate with a SAN entry

Problem

You’ve completed the process of creating a new keystore with a CSR from the Portecle utility:

http://portecle.sourceforge.net/

image

Since the Portecle utility does not provide the feature to include SAN entries:

https://www.sslsupportdesk.com/portecle-advanced-keystore-creation-and-manipulation-tool/

image

This isn’t usually a problem because it is possible to add SAN entries in the Additional Attributes field when submitting the CSR to a Microsoft Certificate Authority server as described here:

How to add a subject alternative name to a secure LDAP certificate
https://support.microsoft.com/en-us/help/931351/how-to-add-a-subject-alternative-name-to-a-secure-ldap-certificate

An example of the format of the string to include is:

san:dns=corpdc1.fabrikam.com&dns=ldap.fabrikam.com

You proceed to submit the request:

image

… but notice that the generated certificate does not include a SAN entry.

Solution

One of the reasons why performing the above would not generate a certificate that includes a SAN entry is if the issuance policy of the Microsoft CA is not configured to accept the Subject Alternative Name(s) attribute via the CA Web enrollment page.  To correct this, execute the following command:

certutil -setreg policy\EditFlags +EDITF_ATTRIBUTESUBJECTALTNAME2

image

Once the above command is executed, stop and start the certificate authority with:

net stop certsvc
net start certsvc

Proceed to use the CA web enrollment page to generate the certificate with the SAN entry.

---------------------------------------------------------------------------------------------------------------------------

Security Concerns:

Note that as per the following Microsoft article:

https://technet.microsoft.com/en-us/library/ff625722(v=ws.10).aspx

It is not recommended to enable the acceptance of the SAN attribute for the CA Web enrollment page so please review the Security best practices for allowing SANs in certificates section in the article above to be aware of the security concerns.

Tuesday, January 31, 2017

Filtering out certificates with blank Common Name when using the Certificate Expiration Alerting command tool

I’ve found that many of my clients with services that rely on Microsoft Certificate Authorities deployed within the internal network have frequently asked me whether there was a way to monitor the expiry of these issued certificates and the answer to that is yes, with the Certificate Expiration Alerting tool found here:

Certificate Expiration Alerting
https://blogs.technet.microsoft.com/nexthop/2011/11/17/certificate-expiration-alerting/

The next common question that usually pops up shortly after testing the tool is whether there was a way to filter out issued certificates that have blank common names as shown in the following screenshot:

CertExpAlerter.exe -c "cert01\Company-CA" -d 312

image

Note that the command above queried for certificates that expire in 312 days and 3 certificates were returned where 2 had blank common names.  The way to filter the common name as described in the TechNet article is with the use of RegEx and the only reason why I am familiar to it is because I used to work with Lync Enterprise voice quite a bit which forced me to learn it for creating translation rules. The RegEx expression we’re interested in is the following:

^(?!\s*$).+

What the above RegEx command matches is any string that contains at least one non-space character which results with the exclusion of blank common names:

image

Hope this helps anyone who is unfamiliar with RegEx and is looking for the expression to filter out blank common names.

Thursday, November 3, 2016

Certificate template not showing up in web enrollment request options for Microsoft Certificate Authority

I ran into an interesting problem at a client this week when I had to request a new certificate from their 2-tier, standalone Root CA and subordinate Enterprise CA, certificate authority infrastructure where a certificate template that we created by duplicating the Web Server template naming it Web Server Exportable then published would not show up in web enrollment request options.  The following are screenshots of the behavior of the web enrollment page after removing all of the published certificate templates and leaving the one I want to use:

https://<subordinateCA>/certserv

clip_image002

No certificate templates could be found. You do not have permission to request a certificate from this CA, or an error occurred while accessing the Active Directory.

clip_image002[4]

Note the (No templates found!) listed in the Certificate template: drop down box:

clip_image002[6]

clip_image002[8]

After troubleshooting for a couple hours and attempting the following solutions found on the internet:

Verified the following KB was not the issue: https://support.microsoft.com/en-us/kb/811418

  1. Check to ensure the security permissions for the certificate template was set appropriately
  2. Ensure that Supply in the request was selected under the Subject Name tab
  3. Created a new application pool and assigned the Certsrv directory to it
  4. Ensure certificate template compatibility was the same or below the domain and forest functional level
  5. Changed the application pool’s advanced settings identity from ApplicationPoolIdentity to NetworkService

... which did not correct my issue, I went ahead and opened a case with Microsoft.

What we noticed was that we would be able to get the published template to show up if we changed the name from Web Server Exportable to Web_Server_Exportable, using a a different name.  This lead the engineer to suspect that there might be something lingering in AD that was causing the template with the original name not to show up in the web enrollment webpage.  To troubleshoot, we exported the Configuration container information to a text file via the ldifde command as such:

ldifde -f out.txt -d "CN=Configuration,DC=ad,DC=domain,DC=bm"

We then did a find on the exported out.txt file and immediately found an entry for WebServerExportable:

clip_image002[10]

What we found was that another certificate authority in Active Directory which was an Enterprise Root CA  had a template published with the same name.  Logging onto that server and launching the Certificate Authority administration console showed the following:

clip_image002[12]

The template listed as <Unknown> was what caused the template on the other CA to not be displayed so we went ahead and removed the template, forced an Active Directory replication with repadmin /syncall /AdePq, reran the ldifde export to confirm the template was no longer listed under this CA, then confirmed that the template is now shown in the web enrollment page.

Hope this post helps anyone who may come across a situation similar to this.

Sunday, May 8, 2016

Unable to start Microsoft CA service after migrating from Cryptographic Service Provider (CSP) to Key Storage Provider (KSP)

Problem

You’ve successfully completed the steps required to migrate your Microsoft CA (Certificate Authority) from Cryptographic Service Provider (CSP) to Key Storage Provider (KSP) after performing the steps outlined in the following TechNet guide:

Migrating a Certification Authority Key from a Cryptographic Service Provider (CSP) to a Key Storage Provider (KSP)
https://technet.microsoft.com/en-us/library/dn771627.aspx

However, you receive the following error when you attempt to start the CA service:

keyset does not exist 0x80090016 certificate services

Reviewing the System logs shows that the following is logged:

Event ID: 7024
Level: Error

The Active Directory Certificate Services service terminated with the following service-specific error:

Keyset does not exist

image

image

Solution

While there could be various solutions to correct the issue, one of the method that worked for my situation was to launch the CA’s Local Computer store, navigate to Personal > Certificates, delete all of the imported CA certificates:

image

Then rerun step #5 in the TechNet article:

https://technet.microsoft.com/en-us/library/dn771627.aspx

Migrate the CA certificate and private key to a KSP:

a.Run the following command:

Certutil –csp <KSP name> -importpfx <Your CA cert/key PFX file>

For example: Certutil –csp “Microsoft Software Key Storage Provider” –importpfx c:\Backup\CorpSubCA.p12

Once the CA’s certificate along with their private keys are reimported, the CA service should now start.

Tuesday, May 3, 2016

Upgrading Microsoft CA (Certification Authority) from SHA1 to SHA256 hash algorithm

I’ve recently been asked by many of my colleagues and clients about what they would need to do to upgrade their internal Microsoft CA from the deprecating SHA1 hash algorithm. The process could be short or long depending on the Cryptographic Settings that the CA is currently configured with. This post will demonstrate the process if your CA is already configured with the Cryptographic Settings Provider as Microsoft Software Key Storage Provider.

Begin by confirming that your CA is indeed configured with the Cryptographic Settings Provider as Microsoft Software Key Storage Provider by logging onto your Certificate Authority server and launching the Certification Authority management console then right clicking on the existing CA and selecting properties:

image

Under the General tab, review the configuration listed for the Provider and ensure that it is Microsoft Software Key Storage Provider:

image

You can also confirm that the current certificate used for signing is SHA1 by clicking on the View Certificate button, then the Details tab and review the Signature algorithm and Signature hash algorithm fields:

image

With the above items confirmed, proceed to change the Hash Algorithm from SHA1 to SHA256 by executing the following command:

certutil -setreg ca\csp\CNGHashAlgorithm SHA256

image

Restart the CA service with the commands:

net stop certsvc

net start certsvc

image

Now when you open the properties of the Certificate Authority, you should see that the Hash algorithm is set to SHA256:

image

With the Hash algorithm updated, continue by renewing the CA certificate as such:

All Tasks > Renew CA Certificate…

image

image

image

A new certificate should now be created that uses the new SHA256 hash algorithm:

image

Here’s a screenshot of before:

image

… and now after with SHA256:

image

Tuesday, March 17, 2015

Generating SSL certificate with OpenSSL for Cisco Wireless Controller

I recently had to use OpenSSL to generate a CSR and complete the certificate request for a Cisco Wireless Controller and noticed that the Cisco provided guide did not include some steps that caused errors to be thrown so I thought it would be good to document the process here in this blog post in case I ever had to do it again.

Cisco recommends OpenSSL 0.9.8 but I was unable to find it because it is most likely very old so I downloaded version 1.0.0q here:

https://slproweb.com/products/Win32OpenSSL.html

The first error you will run into is the following when you try to execute openssl.exe:

C:\OpenSSL-Win32\bin>openssl.exe

WARNING: can't open config file: C:\OpenSSL-Win32\bin\openssl.cfg

OpenSSL>

image

The reason why this error is thrown is because a path needs to get set up for the openssl.cfg configuration file.  Where it is set up does not matter as it just needs to be a valid and accessible path so the following will place it in the C:\OpenSSL-Win32\bin folder:

C:\OpenSSL-Win32\bin>set openssl_conf=c:\OpenSSL-Win32\bin\openssl.cfg

Openssl.exe will execute without errors once the path is set:

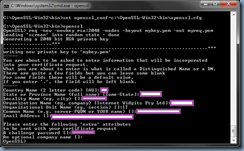
C:\OpenSSL-Win32\bin>openssl

OpenSSL> req -new -newkey rsa:2048 -nodes -keyout mykey.pem -out myreq.pem

Loading 'screen' into random state - done

Generating a 2048 bit RSA private key

.................+++

........................................................................+++

writing new private key to 'mykey.pem'

-----

You are about to be asked to enter information that will be incorporated

into your certificate request.

What you are about to enter is what is called a Distinguished Name or a DN.

There are quite a few fields but you can leave some blank

For some fields there will be a default value,

If you enter '.', the field will be left blank.

-----

Country Name (2 letter code) [AU]:

State or Province Name (full name) [Some-State]:

Locality Name (eg, city) []:

Organization Name (eg, company) [Internet Widgits Pty Ltd]:

Organizational Unit Name (eg, section) []:

Common Name (e.g. server FQDN or YOUR name) []:

Email Address []:

Please enter the following 'extra' attributes

to be sent with your certificate request

A challenge password []:

An optional company name []:

OpenSSL>
image

Once the process shown above is complete, a myreq.pem file will be generated with content similar to the following:

-----BEGIN CERTIFICATE REQUEST-----

MIIC+TCCAeECAQAwgZoxCzAJBgNVBAYTAkJNMREwDwYDVQQIDAhIYW1pbHRvbjER

MA8GA1UEBwwIS5hklohjggf5TAPBgNVBAoMCEFyaWVsIFJlMQswCQYDVQQLDAJJ

VDEYMBYGA1UEAwwPd2xjLmFyaWVscmUuY29tMSswKQYJKoZIhvcNAQkBFhxhbmRy

ZXcud29vZHdvcnRoQGFyaWVscmUuY29tMIIBIjANBgkqhkiG9w0BAQEFAAOCAQ8A

MIIBCgKCAQEA1R43325hjkuiukjl;o9oiiH2x3xoAyZidlW1r3TrdTzcCEqetyYO+e34C

TFAIKx6wWocvIX9GBuNQ7RJmLlM40DaHJXhPbPQvBtyvzJunR+ABvtcnZtfQ63tV

279+rHTrHaspVJU4zEHg9vV6cq6Hhx4mVQfwn+9hjI/a+J4mnTs75giRlgLQna10

XG2XMvmLEvqV5FKQIFuJlYAz5N/A/Qnh3+3lRPBuR5kYSinMeT5WVKORYySdSk4r

SAoGb1gwp1zDirskfhwMzSDNCJAq7gSsc9BA3oITuCoiyB7zonsfEI6XCZ4DZsL5

JJa1a7M1FhcJiU3ULZ8HDLs7Wx+bi7oJwQIDAQABoBkwFwYJKoZIhvcNAQkHMQoM

CFBAc3N3MHJkMA0GCSqGSIb3DQEBBQUAA4IBAQBEjhRQtyMp3qLXkL/h46RVgHOH

P5rPoNXuKhgnTuFrIttyG6ON9hs/w/Ax2tc1rkhCJ3920O9FA9cI5L/GwQzmJXl1

WutujW3t/ysUX3th5ewkiIeYaKeP8lZuAfkhfrmik1SrBz2O8WGwPSOauSH1UgcXo

ubqDWt8MMOnq/GCZ6l/qDYumw47uV9ZeRBBPeMEc7VqN/LJUUdyzJ95thzX9mFwg

Xe47BewbmjKWgwRPotZu702oqU3MNIc0t+IbWdRRhfhLz+PvOBqRxvocdyZE2Szy

8eZfR/0wFr33tzXnqD4DMv2smWGyLpgcymUlz1GXrjF75xuO+Nm7ehqTMFL8

-----END CERTIFICATE REQUEST-----

Copy the content above and submit it to your preferred Certificate Authority to obtain an Apache compatible response CRT file a long with the certificate chain.  With the files obtained from the CA, proceed and open up the files in a text editor and paste them in the following order:

-----BEGIN CERTIFICATE-----

*Device cert*

-----END CERTIFICATE-----

-----BEGIN CERTIFICATE-----

*Intermediate CA cert*

-----END CERTIFICATE-----

-----BEGIN CERTIFICATE-----

*Root CA cert*

-----END CERTIFICATE-----

Below is an example of what it should look like:

Below is the file in its proper format:

-----BEGIN CERTIFICATE-----

MIIFTTCCBDWgAwIBAgIJAKABGuxLwr3OMA0GCSqGSIb3DQEBBQUAMIHKMQswCQYD

VQQGEwJVUzEQMA4GA1UECBMHQXJpem9uYTETMBEGA1UEBxMKU2NvdHRzZGFsZTEa

MBgGA1UEChMRR29EYWRkeS5jb20sIEluYy4xMzAxBgNVBAsTKmh0dHA6Ly9jZXJ0

aWZpY2F0ZXMuZ29kYWRkeS5jb20vcmVwb3NpdG9yeTEwMC4GA1UEAxMnR28gRGFk

ZHkgU2VjdXJlIENlcnRpZmljYXRpb24gQXV0aG9yaXR5MREwDwYDVQQFEwgwNzk2

OTI4NzAeFw0xNTAzMTUwMjI5MzhaFw0xNjAzMTEyMDE0MzhaMD0xITAfBgNVBAsT

GERvbWFpbiBDb250cm9sIFZhbGlkYXRlZDEYMBYGA1UEAxMPd2xjLmFyaWVscmUu

Y29tMIIBIjANBgkqhkiG9w0BAQEFAAOCAQ8AMIIBCgKCAQEA1R38Ur3NWr3WhhHG

PH2x3xoAyZidlW1r3TrdTzcCEqetyYO+e34CTFAIKx6wWocvIX9GBuNQ7RJmLlM4

0DaHJXhPbPQvBtyvzJunR+ABvtcnZtfQ63tV279+rHTrHaspVJU4zEHg9vV6cq6H

hx4mVQfwn+9hjI/a+J4mnTs75giRlgLQna10XG2XMvmLEvqV5FKQIFuJlYAz5N/A

/Qnh3+3lRPBuR5kYSinMeT5WVKORYySdSk4rSAoGb1gwp1zDirskfhwMzSDNCJAq

7gSsc9BA3oITuCoiyB7zonsfEI6XCZ4DZsL5JJa1a7M1FhcJiU3ULZ8HDLs7Wx+b

i7oJwQIDAQABo4IBwDCCAbwwDAYDVR0TAQH/BAIwADAdBgNVHSUEFjAUBggrBgEF

BQcDAQYIKwYBBQUHAwIwDgYDVR0PAQH/BAQDAgWgMDQGA1UdHwQtMCswKaAnoCWG

I2h0dHA6Ly9jcmwuZ29kYWRkeS5jb20vZ2RzMS0xMTIuY3JsMFMGA1UdIARMMEow

SAYLYIZIAYb9bQEHFwEwOTA3BggrBgEFBQcCARYraHR0cDovL2NlcnRpZmljYXRl

cy5nb2RhZGR5LmNvbS9yZXBvc2l0b3J5LzCBgAYIKwYBBQUHAQEEdDByMCQGCCsG

AQUFBzABhhhodHRwOi8vb2NzcC5nb2RhZGR5LmNvbS8wSgYIKwYBBQUHMAKGPmh0

dHA6Ly9jZXJ0aWZpY2F0ZXMuZ29kYWRkeS5jb20vcmVwb3NpdG9yeS9nZF9pbnRl

cm1lZGlhdGUuY3J0MB8GA1UdIwQYMBaAFP2sYTKTbEXW4u6FX5q653aZaMznMC8G

A1UdEQQoMCaCD3dsYy5hcmllbHJlLmNvbYITd3d3LndsYy5hcmllbHJlLmNvbTAd

BgNVHQ4EFgQUmhLDlWChQjzT5mbB7PoGmPdiW+owDQYJKoZIhvcNAQEFBQADggEB

AEtuQGHJBZv8YAFtdIX3YRh+4+pVjpvfZ6TDyRqNYjzrlyUlnJ7+UnG6Ax1G7w9H

6tSsH9HqD31gWj/ka9QpLYxu0lDLTkp1igI6PftMhCCVLhUCGgYaXTR8dKh7RE9f

Wbe9XoAgHJBO1asgPKkaStK50qodocF0mUZA3iB9754kbk0AJY9C1E0CNSKsS3X3

eSZg1cSF2hd9hndCSsj8FFTd/P/i799drXQXWx3BBCaVqgEtLGgU0KvgHpirNUPS

A8aYDY/t3x4vnTVv/1iBR0YdM5IwrgPIfrTTzWZ/SBbgpQ4efm9U89t3VGYeFZeP

iB2b0VLAcjKYBjHIGRQj858=

-----END CERTIFICATE-----

-----BEGIN CERTIFICATE-----

MIIE3jCCA8agAwIBAgICAwEwDQYJKoZIhvcNAQEFBQAwYzELMAkGA1UEBhMCVVMx

ITAfBgNVBAoTGFRoZSBHbyBEYWRkeSBHcm91cCwgSW5jLjExMC8GA1UECxMoR28g

RGFkZHkgQ2xhc3MgMiBDZXJ0aWZpY2F0aW9uIEF1dGhvcml0eTAeFw0wNjExMTYw

MTU0MzdaFw0yNjExMTYwMTU0MzdaMIHKMQswCQYDVQQGEwJVUzEQMA4GA1UECBMH

QXJpem9uYTETMBEGA1UEBxMKU2NvdHRzZGFsZTEaMBgGA1UEChMRR29EYWRkeS5j

b20sIEluYy4xMzAxBgNVBAsTKmh0dHA6Ly9jZXJ0aWZpY2F0ZXMuZ29kYWRkeS5j

b20vcmVwb3NpdG9yeTEwMC4GA1UEAxMnR28gRGFkZHkgU2VjdXJlIENlcnRpZmlj

YXRpb24gQXV0aG9yaXR5MREwDwYDVQQFEwgwNzk2OTI4NzCCASIwDQYJKoZIhvcN

AQEBBQADggEPADCCAQoCggEBAMQt1RWMnCZM7DI161+4WQFapmGBWTtwY6vj3D3H

KrjJM9N55DrtPDAjhI6zMBS2sofDPZVUBJ7fmd0LJR4h3mUpfjWoqVTr9vcyOdQm

VZWt7/v+WIbXnvQAjYwqDL1CBM6nPwT27oDyqu9SoWlm2r4arV3aLGbqGmu75RpR

SgAvSMeYddi5Kcju+GZtCpyz8/x4fKL4o/K1w/O5epHBp+YlLpyo7RJlbmr2EkRT

cDCVw5wrWCs9CHRK8r5RsL+H0EwnWGu1NcWdrxcx+AuP7q2BNgWJCJjPOq8lh8BJ

6qf9Z/dFjpfMFDniNoW1fho3/Rb2cRGadDAW/hOUoz+EDU8CAwEAAaOCATIwggEu

MB0GA1UdDgQWBBT9rGEyk2xF1uLuhV+auud2mWjM5zAfBgNVHSMEGDAWgBTSxLDS

kdRMEXGzYcs9of7dqGrU4zASBgNVHRMBAf8ECDAGAQH/AgEAMDMGCCsGAQUFBwEB

BCcwJTAjBggrBgEFBQcwAYYXaHR0cDovL29jc3AuZ29kYWRkeS5jb20wRgYDVR0f

BD8wPTA7oDmgN4Y1aHR0cDovL2NlcnRpZmljYXRlcy5nb2RhZGR5LmNvbS9yZXBv

c2l0b3J5L2dkcm9vdC5jcmwwSwYDVR0gBEQwQjBABgRVHSAAMDgwNgYIKwYBBQUH

AgEWKmh0dHA6Ly9jZXJ0aWZpY2F0ZXMuZ29kYWRkeS5jb20vcmVwb3NpdG9yeTAO

BgNVHQ8BAf8EBAMCAQYwDQYJKoZIhvcNAQEFBQADggEBANKGwOy9+aG2Z+5mC6IG

OgRQjhVyrEp0lVPLN8tESe8HkGsz2ZbwlFalEzAFPIUyIXvJxwqoJKSQ3kbTJSMU

A2fCENZvD117esyfxVgqwcSeIaha86ykRvOe5GPLL5CkKSkB2XIsKd83ASe8T+5o

0yGPwLPk9Qnt0hCqU7S+8MxZC9Y7lhyVJEnfzuz9p0iRFEUOOjZv2kWzRaJBydTX

RE4+uXR21aITVSzGh6O1mawGhId/dQb8vxRMDsxuxN89txJx9OjxUUAiKEngHUuH

qDTMBqLdElrRhjZkAzVvb3du6/KFUJheqwNTrZEjYx8WnM25sgVjOuH0aBsXBTWV

U+4=

-----END CERTIFICATE-----

-----BEGIN CERTIFICATE-----

MIIEADCCAuigAwIBAgIBADANBgkqhkiG9w0BAQUFADBjMQswCQYDVQQGEwJVUzEh

MB8GA1UEChMYVGhlIEdvIERhZGR5IEdyb3VwLCBJbmMuMTEwLwYDVQQLEyhHbyBE

YWRkeSBDbGFzcyAyIENlcnRpZmljYXRpb24gQXV0aG9yaXR5MB4XDTA0MDYyOTE3

MDYyMFoXDTM0MDYyOTE3MDYyMFowYzELMAkGA1UEBhMCVVMxITAfBgNVBAoTGFRo

ZSBHbyBEYWRkeSBHcm91cCwgSW5jLjExMC8GA1UECxMoR28gRGFkZHkgQ2xhc3Mg

MiBDZXJ0aWZpY2F0aW9uIEF1dGhvcml0eTCCASAwDQYJKoZIhvcNAQEBBQADggEN

ADCCAQgCggEBAN6d1+pXGEmhW+vXX0iG6r7d/+TvZxz0ZWizV3GgXne77ZtJ6XCA

PVYYYwhv2vLM0D9/AlQiVdw4ytoHUwHU9S3/Hd8M+eKsaA7Ugay9qK7HFiH7Eux6w

wdhFJ2+qN1j3hybX2C32qRe3H3I2TqYf34ggfsqbl2i/ojgC95/5Y0V4evLOtXi

EqITLdiOr18SPaadsfew324ARFmR6jYGB0xUGlcmIbYsUfb18aQr4CUWWoriMY

avx4A6lNf4DD+qta/KFApMoZFv6yyO9ecw3ud72a9nmYvLEHZ6IVDd2gWMZEewo+

YihfukEHU1jPEX44dMX4/7VpkI+EdOqXG68CAQOjgcAwgb0wHQYDVR0OBBYEFNLE

sNKR1EwRcbNhyz2h/t2oatTjMIGNBgNVHSMEgYUwgYKAFNLEsNKR1EwRcbNhyz2h

/t2oatTjoWekZTBjMQswCQYDVQQGEwJVUzEhMB8GA1UEChMYVGhlIEdvIERhZGR5

IEdyb3VwLCBJbmMuMTEwLwLKoiuwelkyhHbyBEYWRkeSBDbGFzcyAyIENlcnRpZmlj

YXRpb24gQXV0aG9yaXR5ggEAMAwGA1UdEwQFMAMBAf8wDQYJKoZIhvcNAQEFBQAD

ggEBADJL87LKPpH8EsahB4yOd6AzBhRckB4Y9wimPQoZ+YeAEW5p5JYXMP80kWNy

OO7MHAGjHZQopDH2esRU1/blMVgDoszOYtuURXO1v0XJJLXVggKtI3lpjbi2Tc7P

TMozI+gciKqdi0FuFskg5YmezTvacPd+mSYgFFQlq25zheabIZ0KbIIOqPjCDPoQ

HmyW74cNxA9hi63ugyuV+Idr4y54hj+2DzZduCLzrTia2cyvk0/ZM/iZx4mER

dEr/VxqHD3VILs9RaRegAhJd33552TO7ErBBDpqWeCtWVYpoNz4iCxTIM5Cuf

ReYNnyicsbkqWletNw+vHX/bvZ8=

-----END CERTIFICATE-----

Save the file as All-certs.pem.

Launch openssl.exe again and you’ll notice that if you attempt to execute the Cisco instructed command:

pkcs12 -export -in C:\OpenSSL-Win32\bin\All-certs.pem -inkey C:\OpenSSL

-Win32\bin\mykey.pem -out C:\OpenSSL-Win32\bin\All-certs.p12 -clcerts -passin pa

ss:P@ssw0rd -passout pass:P@ssw0rd

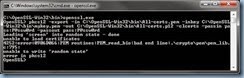
… then you will quickly receive the following error:

unable to write ‘random state’ error
clip_image002

To remove this error, simply set the variable as such:

set RANDFILE=C:\OpenSSL-Win32\bin\.rnd

The error should no longer be thrown once the variable is set:

C:\OpenSSL-Win32\bin>set RANDFILE=C:\OpenSSL-Win32\bin\.rnd

C:\OpenSSL-Win32\bin>openssl.exe

OpenSSL> pkcs12 -export -in C:\OpenSSL-Win32\bin\All-certs.pem -inkey C:\OpenSSL

-Win32\bin\mykey.pem -out C:\OpenSSL-Win32\bin\All-certs.p12 -clcerts -passin pa

ss:P@ssw0rd -passout pass:P@ssw0rd

Loading 'screen' into random state - done

unable to load certificates

4216:error:0906D066:PEM routines:PEM_read_bio:bad end line:.\crypto\pem\pem_lib.

c:795:

error in pkcs12

OpenSSL>

clip_image002[4]

The format of the All-certs.pem file has to be in an exact format as shown above or it won’t work.  Failure to format the All-certs.pem file correctly such as not having the right line breaks will throw the error message:

unable to load certificates

4252:error:0906D066:PEM routines:PEM_read_bio:bad end line:.\crypto\pem\pem_lib.

c:795:

The output would look something like the following:

C:\OpenSSL-Win32\bin>openssl.exe

OpenSSL> pkcs12 -export -in C:\OpenSSL-Win32\bin\All-certs.pem -inkey C:\OpenSSL

-Win32\bin\mykey.pem -out C:\OpenSSL-Win32\bin\All-certs.p12 -clcerts -passin pa

ss:P@ssw0rd -passout pass:P@ssw0rd

Loading 'screen' into random state - done

unable to load certificates

4252:error:0906D066:PEM routines:PEM_read_bio:bad end line:.\crypto\pem\pem_lib.

c:795:

error in pkcs12

OpenSSL>

clip_image002[6]

Fixing the All-certs.pem file with errors such line breaks will remove the error and complete the process of generating the All-certs.p12 file:

C:\OpenSSL-Win32\bin>openssl.exe

OpenSSL> pkcs12 -export -in C:\OpenSSL-Win32\bin\All-certs.pem -inkey C:\OpenSSL-Win32\bin\mykey.pem -out C:\OpenSSL-Win32\bin\All-certs.p12 -clcerts -passin pass:P@ssw0rd -passout pass:P@ssw0rd

Loading 'screen' into random state - done

OpenSSL>

clip_image002[8]

The final step for creating the final-cert.pem file does not require any special steps:

OpenSSL> pkcs12 -in All-certs.p12 -out final-cert.pem -passin pass:P@ssw0rd -pas

sout pass:P@ssw0rd

MAC verified OK

OpenSSL>

clip_image002[10]

The final-cert.pem file is what you will use to upload onto the Cisco Wireless Controller to secure the login web page.

Tuesday, December 9, 2014

Notes when working with Microsoft CA (Certificate Authority) services

I recently had to work with a Microsoft support engineer to troubleshoot an Active Directory Certificate Services issue and managed to write down a few commands he used during the troubleshooting process and thought I’d write a blog post so I can refer to them in the future since I’m bound to forget.

Command to collect CA information CRL:

Before starting the troubleshooting, the engineer ran the following commands to collect base information.

The following certutil command lists the Enterprise Root or Subordinate CAs found in Active Directory:

C:\>certutil

Entry 0:

Name: `test'

Organizational Unit: `'

Organization: `'

Locality: `'

State: `'

Country/region: `'

Config: `conspschsrv.contoso\test'

Exchange Certificate: `'

Signature Certificate: `'

Description: `'

Server: `conspschsrv.contoso'

Authority: `test'

Sanitized Name: `test'

Short Name: `test'

Sanitized Short Name: `test'

Flags: `1'

Web Enrollment Servers: `'

Entry 1:

Name: `CONTOSO ROOT CA'

Organizational Unit: `'

Organization: `'

Locality: `'

State: `'

Country/region: `'

Config: `conCERTSRV.contoso\Contoso ROOT CA'

Exchange Certificate: `'

Signature Certificate: `'

Description: `'

Server: `conCERTSRV.contoso'

Authority: `CONTOSO ROOT CA'

Sanitized Name: `CONTOSO ROOT CA'

Short Name: `CONTOSO ROOT CA'

Sanitized Short Name: `CONTOSO ROOT CA'

Flags: `1'

Web Enrollment Servers: `'

Entry 2: (Local)

Name: `CONTOSO-Sub-CA'

Organizational Unit: `'

Organization: `'

Locality: `'

State: `'

Country/region: `'

Config: `conSCASRV01.contoso\CONTOSO-Sub-CA'

Exchange Certificate: `'

Signature Certificate: `conSCASRV01.contoso_CONTOSO-Sub-CA.crt'

Description: `'

Server: `conSCASRV01.contoso'

Authority: `CONTOSO-Sub-CA'

Sanitized Name: `CONTOSO-Sub-CA'

Short Name: `CONTOSO-Sub-CA'

Sanitized Short Name: `CONTOSO-Sub-CA'

Flags: `13'

Web Enrollment Servers: `'

CertUtil: -dump command completed successfully.

Note that the above output shows that there are currently 3 Enterprise CAs that is found in Active Directory.

-------------------------------------------------------------------------------------------------------------------------------------------------------

The net config rdr command shows how the redirector or workstation is currently configured on your computer.  The following output is from a command prompt on the Enterprise Subordinate CA:

C:\>net config rdr

Computer name \\conSCASRV01

Full Computer name conSCASRV01.contoso

User name TLuk

Workstation active on

NetBT_Tcpip_{4C336E8C-128B-4B8F-99EC-BFD21F1B9E6D} (005056A10F07)

Software version Windows Server 2012 Standard

Workstation domain con-CONTOSO

Workstation Domain DNS Name contoso

Logon domain con-CONTOSO

COM Open Timeout (sec) 0

COM Send Count (byte) 16

COM Send Timeout (msec) 250

The command completed successfully.

-------------------------------------------------------------------------------------------------------------------------------------------------------

The following nltest /dclist:contoso command lists the domain controllers found in Active Directory:

C:\>nltest /dclist:contoso

Get list of DCs in domain 'contoso' from '\\DC2.contoso'.

DC2.contoso [DS] Site: Default-First-Site-Name

DC3.contoso [DS] Site: Default-First-Site-Name

DC1.contoso [PDC] [DS] Site: Default-First-Site-Name

The command completed successfully

C:\>

-------------------------------------------------------------------------------------------------------------------------------------------------------

Command to dump certificate information CRL:

The support engineer suspected that there was something wrong with the published CRL so the following command was executed to check the start and end validity date of the file (I’ve highlighted this information in red:

C:\>certutil -dump Contoso-Root-CA.crl
X509 Certificate Revocation List:
Version: 2
Signature Algorithm:
    Algorithm ObjectId: 1.2.840.113549.1.1.10 RSASSA-PSS
    Algorithm Parameters:
    30 00
Issuer:
    CN=Contoso-Root-CA
  Name Hash(sha1): b8e12ef9872c9e93d65fbd132a2402fa4b0d0dde
  Name Hash(md5): 9fe720a14c52866f8ffb9819659eb114

ThisUpdate: 11/30/2013 3:12 PM
NextUpdate: 11/30/2014 3:32 AM
CRL Entries: 0
CRL Extensions: 5
    2.5.29.35: Flags = 0, Length = 18
    Authority Key Identifier
        KeyID=b2 be 9e 66 df 55 a8 33 b7 72 00 77 a5 2a e5 19 68 6a d9 90

    1.3.6.1.4.1.311.21.1: Flags = 0, Length = 3
    CA Version
        V0.0

    2.5.29.20: Flags = 0, Length = 3
    CRL Number
        CRL Number=02

    1.3.6.1.4.1.311.21.4: Flags = 0, Length = f
    Next CRL Publish
        Saturday, November 29, 2014 3:22:16 PM

    1.3.6.1.4.1.311.21.14: Flags = 0, Length = cb
    Published CRL Locations
        [1]Locations
             Distribution Point Name:
                  Full Name:
                       URL=ldap:///CN=Contoso-Root-CA,CN=BHLRCASRV01,CN=CDP,CN=Pub
lic Key Services,CN=Services,CN=Configuration,DC=contoso,DC=domain,DC=bm?certificateR
evocationList?base?objectClass=cRLDistributionPoint (ldap:///CN=Contoso-Root-CA,CN
=BHLRCASRV01,CN=CDP,CN=Public%20Key%20Services,CN=Services,CN=Configuration,DC=contoso
,DC=domain,DC=bm?certificateRevocationList?base?objectClass=cRLDistributionPoin
t)

Signature Algorithm:
    Algorithm ObjectId: 1.2.840.113549.1.1.10 RSASSA-PSS
    Algorithm Parameters:
    30 00
Signature: UnusedBits=0
    0000  cb e3 84 68 86 fc af 5c  83 6a 1d 5a ef f8 74 11
    0010  ae d8 33 c3 0f cf 99 f9  24 d7 47 d6 90 09 24 a9
    0020  c9 06 c0 4b 3e 91 bc 96  5b cc ba 87 d5 72 68 1c
    0030  60 a7 fc a3 a1 6c 00 b5  5a 76 23 a4 29 89 fe bf
    0040  0d 9c 0f 74 57 15 9a 05  39 0f a3 05 39 a5 08 33
    0050  c5 b2 31 3d 16 b2 69 dd  16 62 09 db d3 d0 37 db
    0060  65 77 bc 4e 06 84 40 0d  e9 35 7c 03 c3 a0 36 4a
    0070  57 6c c8 3f 9b 07 b2 16  f1 16 43 46 de 27 96 7e
    0080  5b 32 e9 6d 24 eb 58 8d  1f 0f e5 ea 41 e4 64 e7
    0090  66 8d 46 f0 0c 4c 3c ab  13 12 da 3a f3 ac 2f cb
    00a0  37 80 9f a5 1d 6d bf db  cc 2e 48 ae 00 b1 56 83
    00b0  e3 0e 02 9a 29 e4 55 58  22 4b a1 ba 0f 1f bd 14
    00c0  3e 0b 37 dc af b3 35 33  48 ba 1c bc b5 6f 22 47
    00d0  49 99 d5 ac e5 68 fd 4f  30 7e ba 63 25 d9 6f 3e
    00e0  0c 3e 26 84 0b 29 6c d4  76 7c 44 8f 2b 71 a0 e9
    00f0  80 71 e0 2f 11 ec e7 02  62 3e 60 05 3a 27 bb 3d
CRL Hash(md5): 40 65 78 62 9a 86 fa 9f fb 77 57 43 e1 bc 23 66
CRL Hash(sha1): 26 92 02 b6 8e ab 26 41 b3 17 18 76 3f c5 41 45 a6 75 54 5e
CRL Hash(sha256): 6da08e776a532e6b92d1ebe7ffd477606f37b7d3659361661c50b8be9919cc
c3
Signature Hash: 438535ec7850261962dff88f6b73c487ae45633c
CertUtil: -dump command completed successfully.

The CRL file this command references can be found in the following directory:

C:\Windows\System32\certsrv\CertEnroll

Note that if this is too short, the period can be extended by launching the Certificate Authority administration console:

image

… right clicking on the Revoked Certificates and selecting properties:

image

… then changing the CRL publication interval to the desired duration:

image

-------------------------------------------------------------------------------------------------------------------------------------------------------

Command to publish certificate to LDAP

Updating the CRL file for http access is simply copying the CRL file from the Root CA’s C:\Windows\System32\certsrv\CertEnroll folder to the same folder on the Subordinate CA but to update the one published through LDAP, the command certuitl -dspublish <Your-Root-CA>.crl <YourSubOrdinateCAServerName is ran on the subordinate CA:

C:\>certutil -dspublish Contoso-Root-CA.crl CONSCASRV01
ldap:///CN=Contoso-Root-CA,CN=BHLSCASRV01,CN=CDP,CN=Public Key Services,CN=Service
s,CN=Configuration,DC=contoso,DC=bhl,DC=bm?certificateRevocationList

Base CRL added to DS store.

CertUtil: -dsPublish command completed successfully.

----------------------------------------------------------------------------------------------------------------------------------------------------------

Verifying published CRL paths:

To verify the published CRL paths, simply export the subordinate CA’s certificate without the private key to a DER format file:

image

Then launch the URL Retrieval Tool by executing certuilt -url <exportedCA>.cer and use the Retrieve button with CRLs (from CDP) selected to verify the accessibility and validity of the files:

image

-------------------------------------------------------------------------------------------------------------------------------------------------------

Determining which certificate the current CA is using:

If the certificate for the CA has been renewed several times, you may end up seeing a list similar to the following:

image

While most of us would probably just look for the certificate with the latest expiry date, another way to do it is to open up the Registry Editor and navigate to the following key:

HKEY_LOCAL_MACHINE\SYSTEM\CurrentControlSet\Services\CertSvc\Configuration\<YourCAName>

The CACertHash key can be used to identify which certificate is currently in use:

image

… by comparing it to the certificate’s Thumbprint as such:

image