Pages

Sunday, February 22, 2015

Customizing Microsoft Lync 2013 client options with registry keys

I’ve recently been asked by a client whether it was possible to set the Lync 2013 client’s Show Menu Bar option as enabled by default:

clip_image002

… and as any IT administrator would respond, my answer was yes because it is most likely configured via a registry key.  While I figured there is a registry key for this setting, the first approach I took was actually downloading the Office 2013 admx templates to see if the policy definitions for the user or computer configuration contained these settings.  What I found was that the policy definitions for the Lync 2013 client contained very little configuration settings so I set off to locate the setting in the registry.

Before I begin, note that the client I am using in this example is 32-bit:

clip_image002

With the above out of the way, all the registry settings for configuring the client is actually located at the following path:

HKCU\Software\Microsoft\Office\15.0\Lync

… and the registry setting for the Show Menu Bar is the REG_BINARY AlwaysShowMenu:

clip_image002[4]

To following 0000 00 value disables the setting:

clip_image002[6]

The following 0000 01 value enables the setting:

clip_image002[8]

clip_image002[10]

Another question that the client asked was whether the Minimize to the notification area instead of the task bar configuration could be enabled by default:

clip_image002[12]

… and this could also be configured via the following registry key in the same path as above:

HKCU\Software\Microsoft\Office\15.0\Lync

REG_DWORD MinimizeWindowToNotificationArea

clip_image002[14]

clip_image002[20]

The value of 0 is to disable and 1 is to enable:

clip_image002[16]

clip_image002[18]

I won’t go into the other configuration settings but most of them could be located in the same registry key folder as well.

Friday, February 20, 2015

Configuring Lync 2013 Federation with Google Talk through XMPP

I’ve been reminded several times by my colleagues over the last two years that I never wrote a blog post demonstrating how to federate Lync Server 2013 with Google Talk and my usual response has always been that there are plenty of posts out there already but because I had to recently configure this for a client, I figure I’ll write the post just so I can say I’ve done it.

Before I begin, please note that Google is going to discontinue XMPP and their Google Hangouts does not support XMPP federation. Adding users on Google Chat has been problematic over the past year as Google has been trying to block domains that SPAM users. What all this basically means is that your mileage will vary and the amount of time Lync 2013 users would be able to IM Google Talk users will be limited. The following blog post by Matt Landis does a good job of explaining this:

Google Blocking XMPP Invites From Federated Partners

http://windowspbx.blogspot.com/2013/03/google-blocking-xmpp-invites-from.html

With that out of the way, the TechNet documentation that I will be following can be found here:

Example XMPP configuration in Lync Server 2013 – XMPP federation with Google Talk

https://technet.microsoft.com/en-us/library/jj204807.aspx

Step #1 – Enable XMPP in the Lync Topology

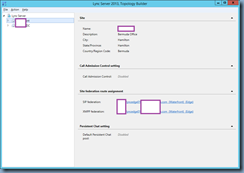
Begin by launching the Lync Server 2013 Topology Builder and loading your organization’s topology:
image

Then open the properties of your Edge server and ensure that Enable XMPP federation for this Edge pool (port 5269) is enabled:

image

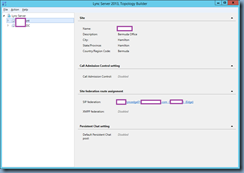
Next, edit the properties of your Lync server and enable the Enable XMPP federation setting:

image

image

image

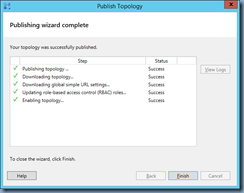
Proceed by publishing the topology:

image

image

Step #2 – Add gmail.com as an XMPP Partner

Continue by launching the Lync Server Management Shell and execute the following cmdlet:

New-CsXmppAllowedPartner gmail.com -TlsNegotiation NotSupported -SaslNegotiation NotSupported -EnableKeepAlive $false -SupportDialbackNegotiation $true

image

The cmdlet above basically configures the following in the XMPP Federated Partners section in the Lync Server 2013 Control Panel:

image

image

Step #3 – Creating a Public DNS SRV Record for XMPP

Create a public SRV record in your public DNS SIP domain with the following properties:

Domain: <your SIP domain>

Service: _xmpp-server

Protocol: _tcp

Priority: 0

Weight: 0

Port number: 5269

Host: <your SIP address>

image

Step #4 (Optional) – Install XMPP Components onto the Edge Server and Assign Certificate

If the configuration setting Enable XMPP federation for this Edge pool (port 5269) was not enabled and you had to enable it during Step #1, log onto the Edge server, launch the Lync Server 2013 Deployment Wizard and run the Setup or Remove Lync Server Components to install the Lync Server XMPP Translating Gateway Proxy:

image

Once the Lync Server XMPP Translating Gateway Proxy has been installed, you should see the service listed in the services console:

image

Ensure that there is a certificate assigned to the XmppServer service by launching Request, Install or Assign Certificates:

image

Step #5 – Ensure that TCP 5269 is allowed through the firewall to the Edge Server

As noted in the following TechNet article:

Port summary - Single consolidated edge with private IP addresses using NAT in Lync Server 2013

https://technet.microsoft.com/en-us/library/gg425891.aspx

… ensure that TCP 5269 is allowed through the firewall and into the Edge server:

image

With the above steps completed, you should now be able to communicate with Google Talk users via Lync 2013.

Thursday, February 19, 2015

Simple batch file to continuously ping a defined set of computers and log failures to a text file

There have been times in the past where I’ve had to set up a quick and dirty way to ping a set of servers for a period of time to determine whether any packets are lost and while there are quite a few tools available to download, I’ve preferred to use the following simple batch file:

@echo off

set logfile=F:\continuousPinglog.txt

setlocal enableDelayedExpansion

echo Starting Continuous Ping !DATE!_!TIME! >> %logfile%

goto main


:func

  ping -n 1 -w 1000 %1 1> NUL 2> NUL

  if %ERRORLEVEL%==1 echo !DATE! !TIME! Problem pinging %1 >> %logfile%

goto :end


:main

  call :func Server001
  call :func Server002
  call :func Server003
  call :func Server004
  call :func Server005
  call :func Server006

  goto :main

:end

Simply paste the commands into Notepad and save the file as a .bat file.  The log generated will display only entries of failures similar to the following output:

image

Wednesday, February 18, 2015

Remotely retrieving Programs and Features list of installed applications on a Windows desktop or server

I was recently asked by a small client to provide them with an inventory of the application installations on their 30 or so desktops for documentation purposes.  The environment did not have any management software that could pull this information so I ended up using a combination of the sc command and psinfo to retrieve the information and thought that I’d write this blog post so I could reference this method in the future.

Remotely Starting Remote Registry

The first step is to start the remote registry service on the remote desktop with the sc command as such:

sc \\desktopName start remoteregistry

You can use a spreadsheet and populate rows with the desktop names and concatenate the sc \\ + desktopName + start remoteregistry then execute the commands in bulk as such:

sc \\Computer001 start remoteregistry
sc \\Computer002 start remoteregistry
sc \\Computer003 start remoteregistry
sc \\Computer004 start remoteregistry
sc \\Computer005 start remoteregistry
sc \\Computer006 start remoteregistry
sc \\Computer007 start remoteregistry

Remotely Dumping Programs and Features List

With the remote registry service enabled, proceed and download the psinfo.exe tool from:

PsInfo v1.77
https://technet.microsoft.com/en-us/sysinternals/bb897550.aspx

Then execute the command to pipe the installed applications on the target computer to a text file as such:

psinfo -s \\Computer > C:\Report\Computer.txt

As with starting the remote registry service, use a spreadsheet and create a list of commands as such:

psinfo -s \\Computer001 > C:\Report\Computer001.txt
psinfo -s \\Computer002 > C:\Report\Computer002.txt
psinfo -s \\Computer003 > C:\Report\Computer003.txt
psinfo -s \\Computer004 > C:\Report\Computer004.txt
psinfo -s \\Computer005 > C:\Report\Computer005.txt
psinfo -s \\Computer006 > C:\Report\Computer006.txt

The output of the text file should look similar to the following:

System information for \\Computer001:
Uptime:                    21 days 4 hours 13 minutes 15 seconds
Kernel version:            Windows 7 Professional, Multiprocessor Free
Product type:              Professional
Product version:           6.1
Service pack:              0
Kernel build number:       7601
Registered organization:   Microsoft
Registered owner:          Microsoft
IE version:                9.0000
System root:               C:\Windows
Processors:                8
Processor speed:           2.3 GHz
Processor type:            Intel(R) Core(TM) i7-2760QM CPU @
Physical memory:           514 MB
Video driver:              Intel(R) HD Graphics Family
Applications:
AT&T Connect Participant Application v9.0.82 9.0.82
Adobe AIR 15.0.0.249
Adobe Acrobat XI Pro 11.0.09
Adobe Flash Player 15 ActiveX 15.0.0.167
Adobe Flash Player 15 Plugin 15.0.0.189
Adobe Reader XI (11.0.09) 11.0.09
Burn.Now 4.5 4.5.0
Corel Burn.Now Lenovo Edition 4.5.0
Corel DVD MovieFactory 7 7.0.0
Corel DVD MovieFactory Lenovo Edition 7.0.0
Corel WinDVD 10.0.5.890
Create Recovery Media 1.20.0.00
D3DX10 15.4.2368.0902
Direct DiscRecorder 1.00.0000
Evernote v. 4.2.3 4.2.3.15
Google Chrome 39.0.2171.95
Google Toolbar for Internet Explorer 7.5.5111.1712
Google Toolbar for Internet Explorer 1.0.0
Google Update Helper 1.3.25.11
Infor Query & Analysis 1.10.0199
Integrated Camera Driver Installer Package Ver.1.1.0.1147 1.1.0.1147
Integrated Camera TWAIN 1.0.11.1223
Intel PROSet Wireless
Intel(R) Control Center 1.2.1.1007
Intel(R) Identity Protection Technology 1.1.2.0 1.1.2.0
Intel(R) Management Engine Components 7.0.0.1144
Intel(R) Processor Graphics 8.15.10.2321
Junk Mail filter update 15.4.3502.0922
Lenovo Patch Utility 1.0.1.1
MSVCRT 15.4.2862.0708
MSVCRT_amd64 15.4.2862.0708
MSXML 4.0 SP2 (KB954430) 4.20.9870.0
MSXML 4.0 SP2 (KB973688) 4.20.9876.0
Mesh Runtime 15.4.5722.2
Microsoft Office Access MUI (English) 2010 14.0.4763.1000
Microsoft Office Access Setup Metadata MUI (English) 2010 14.0.4763.1000
Microsoft Office Excel MUI (English) 2010 14.0.4763.1000
Microsoft Office Groove MUI (English) 2010 14.0.4763.1000
Microsoft Office InfoPath MUI (English) 2010 14.0.4763.1000
Microsoft Office OneNote MUI (English) 2010 14.0.4763.1000
Microsoft Office Outlook MUI (English) 2010 14.0.4763.1000
Microsoft Office PowerPoint MUI (English) 2010 14.0.4763.1000
Microsoft Office Professional Plus 2010 14.0.4763.1000
Microsoft Office Proof (English) 2010 14.0.4763.1000
Microsoft Office Proof (French) 2010 14.0.4763.1000
Microsoft Office Proof (Spanish) 2010 14.0.4763.1000
Microsoft Office Proofing (English) 2010 14.0.4763.1000
Microsoft Office Publisher MUI (English) 2010 14.0.4763.1000
Microsoft Office Shared MUI (English) 2010 14.0.4763.1000
Microsoft Office Shared Setup Metadata MUI (English) 2010 14.0.4763.1000
Microsoft Office Word MUI (English) 2010 14.0.4763.1000
Microsoft SQL Server 2005 Compact Edition [ENU] 3.1.0000
Microsoft Silverlight 4.0.50401.0
Microsoft Visual C++ 2005 Redistributable 8.0.56336
Microsoft Visual C++ 2008 Redistributable - x86 9.0.30729.17 9.0.30729
Microsoft Visual C++ 2008 Redistributable - x86 9.0.30729.4148 9.0.30729.4148
Microsoft Visual J# 2.0 Redistributable Package 2.0.50727
Microsoft Visual J# 2.0 Redistributable Package
Microsoft Visual Studio 2005 Tools for Office Runtime 8.0.60816.0
NVIDIA Stereoscopic 3D Driver 7.17.12.6871
RICOH_Media_Driver_v2.14.18.01 2.14.18.01
Renesas Electronics USB 3.0 Host Controller Driver 2.0.32.0
Security Update for Microsoft .NET Framework 4 Client Profile (KB2604121) 1
Security Update for Microsoft .NET Framework 4 Client Profile (KB2729449) 1
Security Update for Microsoft .NET Framework 4 Client Profile (KB2736428) 1
Security Update for Microsoft .NET Framework 4 Client Profile (KB2737019) 1
Security Update for Microsoft .NET Framework 4 Client Profile (KB2742595) 1
Security Update for Microsoft .NET Framework 4 Client Profile (KB2789642) 1
Security Update for Microsoft .NET Framework 4 Client Profile (KB2840628v2) 2
Security Update for Microsoft .NET Framework 4 Client Profile (KB2858302v2) 2
Security Update for Microsoft .NET Framework 4 Client Profile (KB2894842v2) 2
Security Update for Microsoft .NET Framework 4 Client Profile (KB2901110v2) 2
Security Update for Microsoft .NET Framework 4 Client Profile (KB2931365) 1
Security Update for Microsoft .NET Framework 4 Client Profile (KB2972106) 1
Security Update for Microsoft .NET Framework 4 Client Profile (KB2972215) 1
Security Update for Microsoft .NET Framework 4 Client Profile (KB2978125) 1
Security Update for Microsoft .NET Framework 4 Client Profile (KB2979575v2) 2
Security Update for Microsoft .NET Framework 4 Extended (KB2487367) 1
Security Update for Microsoft .NET Framework 4 Extended (KB2736428) 1
Security Update for Microsoft .NET Framework 4 Extended (KB2742595) 1
Security Update for Microsoft .NET Framework 4 Extended (KB2858302v2) 2
Security Update for Microsoft .NET Framework 4 Extended (KB2894842v2) 2
Security Update for Microsoft .NET Framework 4 Extended (KB2901110v2) 2
Sophos Anti-Virus 10.3.11
Sophos AutoUpdate 3.1.4.81
Sophos Remote Management System 3.4.1
SunSystems 6 61.01.0160
System Update 4.01.0015
ThinkPad Power Manager 3.67
ThinkPad UltraNav Utility 2.13.0
Update for Microsoft .NET Framework 4 Client Profile (KB2836939v3) 3
Update for Microsoft .NET Framework 4 Extended (KB2836939v3) 3
VIP Access 2.0.2.140
Visual Studio 2005 Tools for Office Second Edition Runtime
Windows Live Communications Platform 15.4.3502.0922
Windows Live Essentials 15.4.3502.0922
Windows Live Essentials 15.4.3508.1109
Windows Live Installer 15.4.3502.0922
Windows Live Mail 15.4.3502.0922
Windows Live Mesh 15.4.3502.0922
Windows Live Mesh ActiveX Control for Remote Connections 15.4.5722.2
Windows Live Messenger 15.4.3502.0922
Windows Live Movie Maker 15.4.3502.0922
Windows Live PIMT Platform 15.4.3508.1109
Windows Live Photo Common 15.4.3502.0922
Windows Live Photo Gallery 15.4.3502.0922
Windows Live SOXE 15.4.3502.0922
Windows Live SOXE Definitions 15.4.3502.0922
Windows Live UX Platform 15.4.3502.0922
Windows Live UX Platform Language Pack 15.4.3508.1109
Windows Live Writer 15.4.3502.0922
Windows Live Writer Resources 15.4.3502.0922

Monday, January 26, 2015

Firewall Port Requirements for Citrix NetScaler 10 and Citrix XenApp 7.6

I’ve noticed over the past year that one of the questions I get asked often is where to find specific Citrix documentation outlining the firewall port requirements and rules required to publish a XenApp environment through a NetScaler appliance and I find that every time I forward the following Citrix KB:

Required Ports for Citrix NetScaler Gateway in DMZ Setup
http://support.citrix.com/article/CTX113250

… I always get follow up questions about what is required for their environment so I thought I’d write a quick blog post supplying a diagram that provides a sample configuration.  The following example is a NetScaler deployed with two interfaces where one leg sits in an outside DMZ and the other on an inside DMZ.  Firewall rules are set up as shown in the following diagram between the DMZ networks and the internal server VLAN where the Citrix Delivery Controller, StoreFront, Application server and Active Directory Domain Controllers reside. The rules allow users to access the portal via http or https (http gets redirected to https) and the NetScaler is able to either use LDAP on port 389 or LDAPS on port 636 to authenticate against the domain controllers as well as communicate to the StoreFront server either http or https:

image

Note that the configuration above is simply a sample and may not work for every environment so I’m supplying it “as is” but hope that it would be able to help someone get started with their environment.

Monday, January 19, 2015

Unable to grant a mail enabled security group permissions to a resource calendar in Exchange 2013

Problem

You would like to grant a distribution group configured in an Exchange 2013 organization permissions to a resource calendar:

image

… so you open up the properties of the group:

image

… and change the Group type from Distribution to Security:

image

You proceed to use the Add-MailboxFolderPermissions cmdlet to add the distribution group as a reviewer but receive the following error:

Add-MailboxFolderPermission “<ResourceMailBox>:\calendar” -user <SMTPofGroup> -accessrights “Reviewer”

The user “<SMTPofGroup>” is either not valid SMTP address, or there is no matching information.

+ CategoryInfo: NotSpecified (:) [Add-MailboxFolderPermission], InvalidExternalUserIdException

+ FullyQualifiedErrorId : [Server=<serverName>,RequestId=3ad24ea6-18c4-4abd-97da-f875f50790c5,TimeStamp=1/16/2015 2:04:35 PM] [FailureCategory=Cmdlet-InvalidExternalUserIdException] E4DC5802,Microsoft.Exchange.Management.StoreTasks.AddMailboxFolderPermission

+ PSComputerName : <serverName.FQDN>

image

Solution

There are actually a few reasons why the error message above would be thrown and the obvious one is if the group isn’t a security group or, as the error message indicates, the SMTP address specified is not valid but for the situation I encountered, it wasn’t as obvious until I tried opening the resource calendar’s properties and add it via the GUI which was when I received the following error:

Microsoft Outlook

One or more users cannot be added to the folder access list.

Non-local users cannot be given rights on this server.

image

Seeing this error message immediately reminded me that because I had converted the group from distribution to security, I needed to set the group to restrict members from removing their membership with the following cmdlet:

Set-Distributiongroup -identity <GroupName> -MemberDepartRestriction Closed

image

Once I successfully executed the cmdlet above, I was then able to add the group as a reviewer to the resource mailbox’s calendar:

image

Thursday, January 15, 2015

Unable to start the vCenter Site Recovery Manager Server service after migrating the SRM SQL database to another server

I was recently asked by a client to assist with migrating their current VMware Site Recovery Manager 5.1.1.7655 from one database server to another.  As I’ve done this in the past a few times, I figure it wouldn’t take me much time but to my surprise it too much longer than I thought so I figure this warranted a blog post in case I run into this again. 

I began by backing up the production SRM database to a BAK file, recreated the SQL Authentication account on the new SQL server, then restored the SRM database.  As I wasn’t the consultant who deployed this instance of SRM, I noticed that the database’s schema and owner was set to dbo and not the service account.  What the person who deployed SRM had done was simply make the service account an sysadmin on the database server which I figure I’d take the opportunity to correct so I used an old blog post I wrote for SRM 4:

Recovering / reinstalling SRM (Site Recovery Manager) 4.1.1 after suffering a host failure
http://terenceluk.blogspot.com/2011/10/recovering-reinstalling-srm-site.html

… to configure the schema and service account as per the following VMware KB:

Connecting to VMware vCenter Site Recovery Manager fails with the error: Unable to start Site Recovery Manager Service (1027973)
http://kb.vmware.com/selfservice/microsites/search.do?language=en_US&cmd=displayKC&externalId=1027973

The database schema has three requirements:

  • It must be owned by the SRM database user (the database user name you supply when configuring the SRM database connection).
  • It must be the default schema for the SRM database user.
  • The database schema name must be the same as the database user name.

image

Then reconfigured the ODBC connector to point to the new SQL server but quickly noticed that when I try to start the VMware vCenter Site Recovery Manager Service service, I receive the following error:

Windows could not start the VMware vCenter Site Recovery Manager Server service on Local Computer

Error 1067: The process terminated unexpectedly.

image

Unfortunately, the event logs doesn’t provide much more information than an Event ID: 7034 error with the message:

The VMware vCenter Site Recovery Manager Server service terminated unexpectedly. It has done this 4 times(s).

image

What was strange was that if I made the service account a sysadmin, the service would start:

image

After combing through setting after setting between the two SQL servers and not finding any differences other than having configured the service account the correct way, I noticed that when I browse the restored database properties on the new server, navigate to the Files page, the Owner field was blank:

image

Attempting to assign the service account would fail because it indicates that account already has the mapping. So I went ahead and removed the database mapping from the service account’s properties then went back into the database’s properties to assign the owner as the service account and this time it worked.  Reviewing the User Mapping tab now shows the following:

image

It’s a big strange that the screenshot above lists the user and default schema as dbo while the Owner for the database properties is listed as the service account:

image

… but the service now starts:

clip_image002

I explained the situation to the client and proposed that it is possible to try and reconfigure the mappings back to what we expect it to be and try a SRM reinstall mimicking a server loss issue but the client was ok with the current configuration for now.

Hope this helps anyone who may come across such a situation and unable to actually perform a reinstall of SRM.